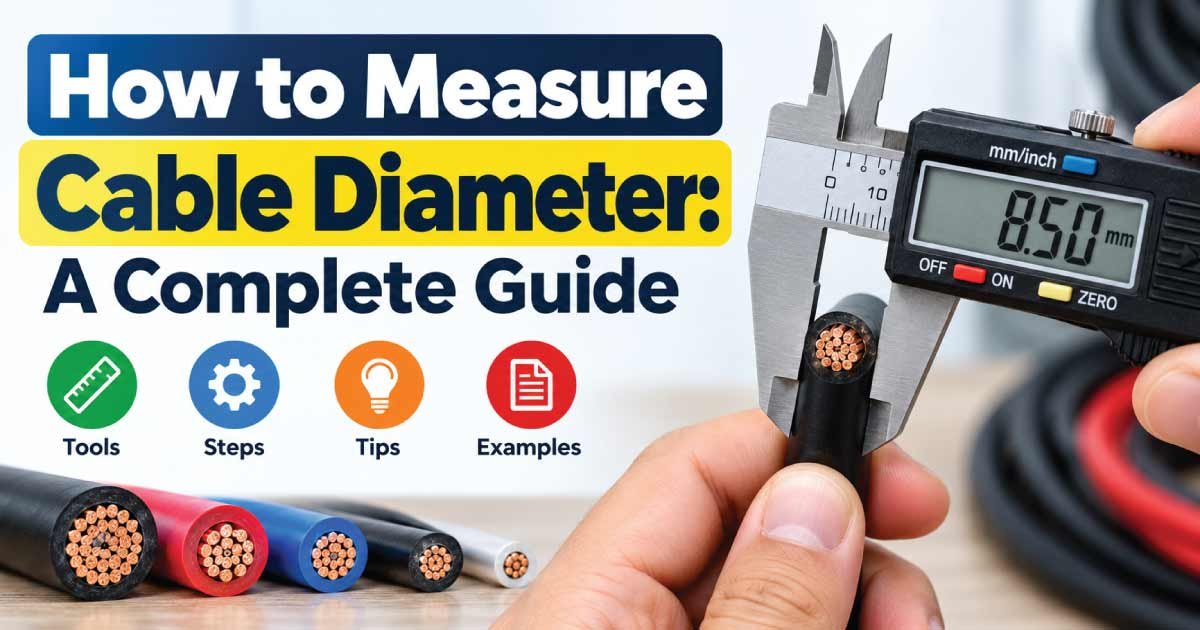
Knowing how to measure cable diameter accurately is useful when selecting electrical cables, checking an existing installation, identifying an unknown cable, or determining whether a cable will fit through a conduit, gland, connector, or terminal. Cable diameter can also help when comparing cable sizes, estimating space requirements, and checking physical compatibility.
The measurement process is straightforward when you use the right method. However, one important point is that overall cable diameter is not the same as conductor diameter. A cable may contain one or more conductors surrounded by insulation, shielding, fillers, armor, or an outer jacket.
This guide explains how to measure cable diameter with a digital caliper, micrometer, ruler, and other practical methods. It also covers cable diameter versus wire size, measuring armored and multi-core cables, converting measurements, common mistakes, and how to use the result when selecting cable accessories.
What Is Cable Diameter?
Cable diameter is the outside-to-outside distance across a cable at its widest point, normally measured through the center of the cable. For a round cable, this is the diameter of its outer surface.
The term can refer to different measurements depending on the application:
- Overall cable diameter: The outside diameter including insulation and outer jacket.
- Conductor diameter: The diameter of the conductive metal portion.
- Insulation diameter: The diameter over an individual insulated conductor.
- Shield diameter: The diameter over a cable shield or screen.
- Armor diameter: The outside diameter including metallic armor where applicable.
For most cable installation questions, the relevant measurement is overall cable diameter because it determines physical fit.
For example, when checking whether a cable can pass through a cable gland, conduit, or protective sleeve, measuring only the copper conductor would produce an incorrect result.
Why Cable Diameter Matters
Cable diameter affects several practical decisions:
- Cable gland and connector selection
- Conduit and trunking space
- Cable tray capacity
- Protective sleeve selection
- Bend radius considerations
- Cable routing
- Connector compatibility
- Mechanical protection
- Identification of unknown cable types
Electrical performance, however, cannot be determined from outside diameter alone. Two cables can have similar overall diameters while having different conductor sizes, insulation materials, voltage ratings, or construction.
Cable Diameter vs. Wire Size
One of the most common mistakes is assuming that cable diameter directly tells you the electrical size of the conductor.
It does not.
Wire size is normally specified using a conductor cross-sectional area, such as mm², or a wire gauge system such as AWG. Cable diameter describes a physical dimension.
For example, a cable with a particular outside diameter could contain:
- A relatively small conductor with thick insulation
- Multiple smaller conductors
- Shielding
- Fillers
- Armor
- A heavy outer jacket
Therefore, measuring the outside diameter does not reliably identify the conductor’s ampacity or current-carrying capacity.
| Measurement | What It Describes | Typical Unit |
|---|---|---|
| Overall cable diameter | Outside diameter of complete cable | mm or in |
| Conductor diameter | Diameter of conductor | mm or in |
| Conductor area | Electrical conductor cross-section | mm² |
| Wire gauge | Standardized conductor size system | AWG |
| Cable length | Distance from one end to another | m or ft |
If you need to determine the electrical capacity of a cable, check its markings, manufacturer specifications, applicable standard, and installation requirements rather than relying solely on its measured diameter.
Tools Needed to Measure Cable Diameter
The best measuring tool depends on how accurately you need to measure the cable.
Digital Caliper
A digital caliper is usually the most practical tool for measuring the outside diameter of a round cable.
It can measure in millimeters or inches and typically provides better precision than a standard ruler.
A caliper is particularly useful for:
- Small electrical cables
- Control cables
- Flexible cables
- Coaxial cables
- Multi-core cables
- Cable gland sizing
Make sure the caliper jaws are clean and that you do not squeeze the cable excessively.
Micrometer
A micrometer can provide highly precise measurements, but it requires more care when measuring soft or flexible cable jackets.
If too much pressure is applied, the insulation can compress and produce a diameter reading smaller than the actual free-standing diameter.
For many general cable-selection tasks, a good-quality digital caliper is sufficiently practical.
Ruler or Measuring Tape
A ruler can be used when precision is not critical. It is suitable for relatively large cables or quick measurements.
However, reading a round cable against a ruler can be difficult, particularly when the cable diameter is only a few millimeters.
A flexible measuring tape can also be used indirectly by measuring the circumference and calculating diameter.
How to Measure Cable Diameter With a Caliper
A digital caliper is one of the easiest ways to obtain a reliable cable diameter measurement.
Step 1: Disconnect and Isolate the Cable
If the cable is part of an electrical installation, safety comes first.
Do not measure an energized cable by handling or manipulating exposed conductors. Follow the appropriate electrical isolation and verification procedures for the installation.
If possible, measure an accessible, de-energized section of cable.
Step 2: Inspect the Cable
Look at the cable before measuring it.
Determine whether it is:
- Single-core
- Multi-core
- Shielded
- Armored
- Flat
- Round
- Flexible
- Covered with an additional protective jacket
Also look for printed markings on the cable. The jacket may identify the conductor size, voltage rating, number of cores, manufacturer, or cable type.
These markings can be more useful for identifying the cable than its outside diameter alone.
Step 3: Clean the Measuring Area
Remove dirt, dust, grease, or debris from the outside of the cable.
Do not remove insulation or the outer jacket simply to obtain a measurement.
Step 4: Open the Caliper Jaws
Turn on the digital caliper and select the appropriate unit, such as mm or inches.
Close the jaws completely and verify that the display reads zero before measuring.
Step 5: Position the Cable Between the Jaws
Place the cable between the outside measuring jaws.
The jaws should contact opposite sides of the cable.
For a round cable, position the caliper approximately perpendicular to the cable’s length. The goal is to measure the widest distance across the cable.
Step 6: Apply Gentle Pressure
Close the jaws until they touch the cable.
Do not squeeze a soft cable. Excessive force can compress the jacket and produce a falsely low reading.
Step 7: Read the Measurement
Record the diameter shown on the display.
For example, suppose the caliper reads:
12.6 mm
The measured overall cable diameter is approximately 12.6 mm at that location.
Step 8: Repeat the Measurement
Measure the cable at several points.
This is especially important for flexible cables because their outer jacket may not be perfectly uniform.
A useful practice is to take measurements at different positions and, where appropriate, rotate the cable slightly while measuring.
If the readings are very different, investigate whether the cable is oval, damaged, compressed, or constructed with an irregular outer jacket.
How to Measure Cable Diameter Without a Caliper
If you do not have a caliper, you can still obtain a reasonable measurement using a ruler or flexible tape.
Using a Ruler
Place the cable next to a ruler and estimate the distance across its widest point.
This method works better with larger cables where a small measurement error has less practical significance.
For example, if the cable appears to measure approximately 15 mm across, record the measurement as approximately 15 mm, rather than claiming unnecessary precision.
Using Cable Circumference
For larger or difficult-to-measure cables, measuring circumference can be useful.
Wrap a flexible measuring tape around the cable without compressing it.
Then use the diameter formula:
D = C ÷ π
Where:
- D = diameter
- C = circumference
- π ≈ 3.14159
For example, if the measured circumference is 31.4 mm:
D = 31.4 ÷ 3.14159 ≈ 10.0 mm
So the approximate cable diameter is 10 mm.
This method is particularly useful when the cable is too large to fit comfortably between the jaws of a standard caliper.
How to Measure the Diameter of a Multi-Core Cable
Multi-core cables require special attention because you normally want to measure the complete cable assembly, not each conductor individually.
Place the caliper around the outside of the complete cable jacket.
Do not measure individual cores unless you specifically need the diameter of each insulated conductor.
For example, a four-core cable may contain four separate insulated conductors inside one outer jacket. Measuring one core does not provide the overall cable diameter.
What to Record
For a multi-core cable, record:
- Number of cores
- Overall diameter
- Cable type if known
- Conductor size if marked
- Voltage rating if marked
- Shielding or armor
- Manufacturer identification if available
This information makes later cable identification much more reliable.
How to Measure Armored Cable Diameter
Armored cable can be more difficult because its outer construction may include metallic armor beneath an external sheath.
If you are selecting a cable gland, clamp, protective accessory, or routing component, determine which diameter the accessory manufacturer requires.
Depending on the application, the relevant dimension may be:
- Diameter over the complete sheath
- Diameter over the armor
- Diameter range specified for the gland
- Diameter of the inner bedding or cable portion
Do not assume that one measured dimension applies to every cable accessory.
For critical installations, compare your measurement with the manufacturer’s cable gland or accessory sizing table.
How to Measure Flat Cable
Flat cable cannot be treated exactly like a round cable.
Instead of measuring one diameter, record its physical dimensions:
- Overall width
- Overall thickness
For example:
| Dimension | Measurement |
|---|---|
| Cable width | 18 mm |
| Cable thickness | 4 mm |
For flat ribbon cables and similar constructions, width and thickness are generally more useful than attempting to calculate a circular diameter.
If the cable will be installed inside a channel or enclosure, both dimensions should be considered.
Cable Diameter Measurement Chart
The following example illustrates how measured outside diameter can be recorded. These are measurement examples, not electrical cable size specifications.
| Cable | Measured Diameter (mm) | Approx. Diameter (in) | Measurement Type |
|---|---|---|---|
| Cable A | 5 mm | 0.197 in | Overall |
| Cable B | 8 mm | 0.315 in | Overall |
| Cable C | 10 mm | 0.394 in | Overall |
| Cable D | 12.5 mm | 0.492 in | Overall |
| Cable E | 16 mm | 0.630 in | Overall |
| Cable F | 20 mm | 0.787 in | Overall |
| Cable G | 25 mm | 0.984 in | Overall |
| Cable H | 30 mm | 1.181 in | Overall |
Actual cable dimensions vary by construction, insulation, manufacturer, voltage class, shielding, armor, and applicable standards. Always use the manufacturer’s dimensional information when an exact fit is required.
How to Convert Cable Diameter From mm to Inches
Cable measurements are commonly provided in millimeters, while some equipment and older documentation use inches.
The basic conversion is:
1 inch = 25.4 mm
To convert millimeters to inches:
Inches = mm ÷ 25.4
For example:
10 mm ÷ 25.4 = 0.394 inches
To convert inches to millimeters:
mm = inches × 25.4
For example:
0.5 inch × 25.4 = 12.7 mm
Keeping the original measurement in its native unit can help avoid unnecessary rounding errors, particularly when selecting components with narrow dimensional tolerances.
How Cable Diameter Helps With Cable Gland Selection
One of the most common reasons people measure cable diameter is to select the correct cable gland.
Cable glands generally have a specified cable diameter range. Your measured cable diameter should fall within the manufacturer’s stated range.
For example, if a gland is specified for a particular diameter range, compare your actual cable measurement with that range rather than selecting a gland based on the nominal conductor size.
This is important because cable glands are designed around the physical dimensions of the cable.
When selecting a gland, also consider:
- Cable construction
- Gland material
- Environmental conditions
- IP or ingress protection requirements
- Armored or unarmored construction
- Installation location
- Manufacturer requirements
A correct diameter measurement is only one part of proper gland selection.
Common Mistakes When Measuring Cable Diameter
Small measurement errors can lead to poor component selection, especially when the available fitting has a narrow size range.
Measuring the Conductor Instead of the Cable
If the goal is to determine the cable’s outside dimensions, measuring the copper or aluminum conductor is incorrect.
Measure the complete cable exterior.
Compressing the Cable
Soft insulation and flexible jackets can deform when squeezed.
Use only enough pressure for the caliper jaws to contact the surface.
Measuring a Damaged Section
A crushed or flattened cable may not represent its original diameter.
Whenever possible, measure an undamaged section.
Measuring Only Once
One measurement can be misleading.
Take several measurements along the cable when dimensional accuracy matters.
Assuming Diameter Determines Electrical Capacity
Outside diameter cannot reliably tell you ampacity, conductor area, or voltage rating.
Use cable markings and technical documentation for electrical specifications.
Ignoring Cable Shape
An oval or irregular cable may have different dimensions depending on where you measure it.
For such cables, record the relevant width and thickness rather than forcing the measurement into a single diameter value.
Tips for Getting a More Accurate Cable Measurement
Follow these practical guidelines when measuring cable diameter:
- Use a digital caliper when greater precision is required.
- Measure the cable at an undamaged, representative location.
- Avoid squeezing flexible insulation.
- Take multiple readings.
- Record the unit clearly as mm or inches.
- Check cable markings before assuming the cable type.
- Distinguish overall diameter from conductor diameter.
- For flat cable, record width and thickness.
- For large cable, circumference can be converted to diameter.
- Check manufacturer drawings when selecting glands, connectors, or other precision-fit components.
- Do not use outside diameter alone to determine electrical ratings.
When You Should Use Manufacturer Specifications
A physical measurement is useful, but it does not replace technical documentation when exact specifications matter.
Manufacturer documentation should be consulted when you need to determine:
- Conductor cross-sectional area
- Current-carrying capacity
- Voltage rating
- Minimum bend radius
- Insulation type
- Temperature rating
- Cable gland compatibility
- Armor construction
- Environmental suitability
- Applicable standards
This is particularly important for industrial, commercial, and safety-critical installations.
The measured diameter can confirm physical dimensions, while the manufacturer’s documentation provides the electrical and construction information needed for proper selection.
Frequently Asked Questions About Measuring Cable Diameter
How do you measure cable diameter accurately?
The easiest accurate method is to use a digital caliper. Place the cable between the jaws, close them gently until they contact opposite sides, and record the reading. Take several measurements along the cable and avoid compressing flexible insulation, which can make the measured diameter smaller than the actual size.
Is cable diameter the same as wire diameter?
No. Cable diameter usually refers to the outside diameter of the complete cable, including insulation and outer jacket. Wire diameter generally refers to a conductor or wire itself. A cable’s electrical size is better identified using conductor area, wire gauge, cable markings, or manufacturer specifications.
Can I measure cable diameter with a ruler?
Yes. A ruler can provide an approximate measurement, particularly for larger cables. However, a digital caliper is generally easier to use when greater precision is needed. For large cables, you can also measure circumference with a flexible tape and calculate diameter using the formula D = C ÷ π.
Why does cable diameter matter for cable glands?
Cable glands are designed to grip and seal cables within specified diameter ranges. Measuring the overall cable diameter helps you compare the actual cable with the gland manufacturer’s sizing range. For armored cables, make sure you identify which dimensional measurement the specific gland requires.
Can cable diameter tell me the wire size?
Not reliably. The same outside diameter can result from different combinations of conductor size, insulation thickness, shielding, fillers, and outer jacket construction. If you need the conductor size, check the cable marking or manufacturer’s documentation rather than estimating it solely from outside diameter.
Conclusion
Learning how to measure cable diameter is straightforward when you use the correct technique. For most round cables, a digital caliper provides a practical and accurate measurement. Place the jaws across the complete cable, apply gentle pressure, and record the outside diameter without compressing the insulation.
For larger cables, measuring circumference and calculating diameter can be a useful alternative. Flat cables should be measured by width and thickness rather than treated as round cables.
Most importantly, remember that cable diameter is a physical measurement, not an electrical rating. Use cable markings and manufacturer specifications to determine conductor size, ampacity, voltage rating, bend radius, and other technical requirements. When selecting cable glands or other accessories, compare your measured diameter with the relevant manufacturer’s dimensional range.