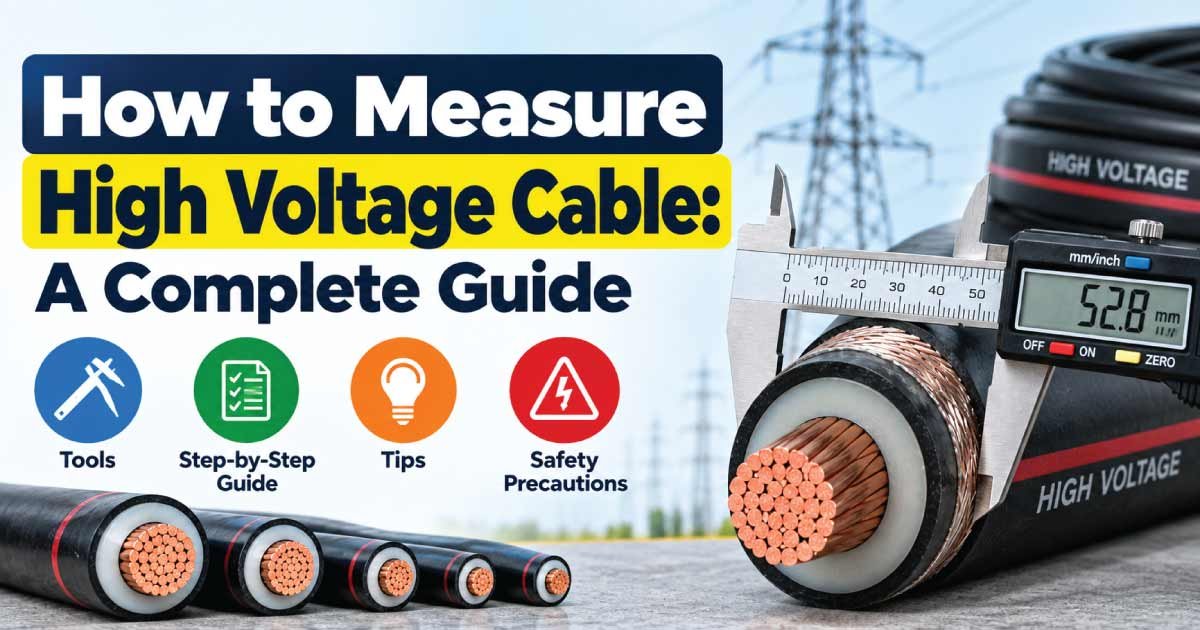
Measuring high voltage cable requires more than simply checking its length. Depending on the application, you may need to determine the cable length, overall diameter, conductor size, insulation thickness, voltage rating, construction, and installation requirements.
Because high voltage systems can present severe electrical hazards, physical measurements should only be performed on properly isolated, de-energized, and secured cable by qualified personnel. Never attempt to measure an energized high voltage conductor with ordinary measuring equipment.
This guide explains how to measure high voltage cable safely and accurately, what dimensions matter, which tools are appropriate, how cable size differs from cable diameter, and how to use manufacturer information and applicable standards when selecting or replacing high voltage cable.
What Measurements Matter for High Voltage Cable?
A high voltage cable has several physical and electrical characteristics. The measurement you need depends on whether you are installing new cable, identifying an existing cable, replacing damaged cable, or checking whether a cable will fit a particular installation.
Important cable measurements and specifications include:
- Overall cable length
- Overall outside diameter
- Conductor cross-sectional area
- Conductor diameter
- Insulation thickness
- Shield or screen construction
- Voltage rating
- Cable category or designation
- Conductor material
- Number of cores
- Jacket dimensions
- Minimum bending radius
- Installation temperature requirements
These characteristics are related but should not be confused.
For example, the outside diameter measures the complete cable, while conductor size refers only to the conductive portion. Similarly, measuring the insulation thickness does not by itself establish the cable’s voltage rating.
For high voltage applications, the cable’s identification marking and technical datasheet are often more important than physical measurements alone.
How to Measure High Voltage Cable Length
Cable length is usually the simplest physical measurement to obtain, provided the cable is safely isolated and accessible.
Measuring a Loose High Voltage Cable
If the cable has been removed from service and is safely available for inspection, use a suitable measuring tape.
The basic process is:
- Confirm that the cable is de-energized, isolated, and safe to handle according to the applicable electrical safety procedure.
- Place the cable on a suitable surface.
- Avoid unnecessary sharp bends or stretching.
- Start the measuring tape at one end.
- Follow the cable along its actual length.
- Record the measurement at the opposite end.
- Record the result in meters or feet.
Do not pull the cable tightly to make it straight. Excessive mechanical force can damage cable components and can produce an inaccurate measurement.
Measuring an Installed Cable Route
When planning a replacement cable, the required length should be based on the actual installation route, not simply the straight-line distance between two pieces of equipment.
Measure along:
- Cable trays
- Conduits
- Vertical sections
- Horizontal runs
- Equipment entry points
- Bends
- Trenches
- Risers
- Termination areas
Allow for the cable length required by the manufacturer’s installation instructions and termination arrangement. Do not add an arbitrary amount without considering the actual installation requirements.
How to Measure High Voltage Cable Diameter
The outside diameter is important when determining whether a cable can fit through a conduit, gland, tray, duct, or other installation space.
The overall diameter includes much more than the conductor.
It can include:
- Conductor
- Conductor screen
- Insulation
- Insulation screen
- Metallic screen or shield
- Water-blocking components
- Filler materials
- Inner sheath
- Armor
- Outer jacket
Because high voltage cable construction varies significantly, two cables with similar electrical ratings can have different outside diameters.
Using a Digital Caliper
For an accessible, de-energized cable, a digital caliper can provide a useful physical diameter measurement.
To measure:
- Clean the cable surface if necessary.
- Position the cable between the caliper jaws.
- Close the jaws gently against the outer surface.
- Avoid compressing the jacket.
- Read the measurement.
- Repeat at several locations if necessary.
For large-diameter cables, a suitable diameter tape or circumference measurement method may be more practical than a standard caliper.
Measure Without Compressing the Cable
Flexible cable jackets can deform when excessive pressure is applied.
This can produce an artificially small diameter.
Therefore, the measuring instrument should contact the cable without significantly compressing it.
If the manufacturer’s datasheet provides the nominal outside diameter, use that information when determining installation compatibility.
How to Measure High Voltage Cable Conductor Size
Conductor size is one of the most important specifications in cable selection.
It is commonly expressed as cross-sectional area, such as mm², rather than simply the outside diameter of the complete cable.
For example, a conductor may be specified by its cross-sectional area rather than by measuring the complete cable jacket.
Measuring an Exposed Conductor
A conductor should only be physically inspected or measured when the cable has been appropriately removed, isolated, and made safe by qualified personnel.
If an individual conductor is accessible, its dimensions may be measured using an appropriate instrument. However, simply measuring the diameter of a stranded conductor does not always provide a direct equivalent to its nominal cross-sectional area because of strand arrangement, compaction, and construction.
For this reason, the manufacturer’s cable designation and technical documentation should normally be used to establish conductor size.
Why Cable Diameter Does Not Determine Conductor Size
A high voltage cable’s outside diameter includes insulation and protective layers.
Consequently, two cables can have the same outside diameter while having different conductor cross-sectional areas.
Likewise, cables with the same conductor size can have different overall diameters because of differences in insulation, shielding, armor, and jacket construction.
How to Measure High Voltage Cable Insulation
Insulation is a critical part of a high voltage cable because it separates the conductor from other conductive components and the surrounding environment.
However, insulation thickness should not be determined by casually cutting into an installed cable.
Doing so can destroy the cable and create a serious safety hazard if its electrical condition has not been properly established.
Use Manufacturer Specifications
For most cable-identification and replacement work, the safest approach is to obtain insulation information from:
- Cable markings
- Manufacturer datasheets
- Product catalogs
- Engineering drawings
- Installation documentation
- Cable schedules
- Procurement records
If a physical cross-section is legitimately available from a decommissioned cable sample, qualified personnel can measure its construction using appropriate inspection methods.
Insulation Thickness Is Not the Same as Voltage Rating
A common misunderstanding is that a thicker insulation layer automatically means a higher voltage rating.
High voltage cable design involves much more than thickness. Insulation material, electrical stress control, screening, manufacturing quality, testing, operating conditions, and the applicable standard all matter.
Therefore, never select a high voltage cable solely because its insulation appears thick enough.
How to Identify High Voltage Cable Voltage Rating
Voltage rating is normally identified from the cable marking, manufacturer documentation, or engineering specifications rather than by physical measurement.
Look for information indicating:
- Rated voltage
- Cable type
- Number of cores
- Conductor material
- Conductor size
- Insulation material
- Screen construction
- Manufacturer
- Applicable designation or standard
The exact notation varies between cable systems and manufacturers.
A cable’s voltage rating should be verified against the equipment and electrical system requirements before installation.
Why Physical Measurement Cannot Confirm Voltage Rating
You cannot reliably determine a cable’s voltage rating simply by measuring its diameter.
The cable’s electrical performance depends on its complete construction and tested characteristics.
A visually thick cable is not automatically suitable for a high voltage application.
High Voltage Cable Construction
Understanding cable construction helps explain why physical measurements vary.
A typical high voltage cable may contain several layers.
Conductor
The conductor carries the electrical current and may be made from copper or aluminum, depending on the cable design.
Conductor Screen
Many high voltage cable designs use a semiconducting conductor screen to help control electrical stress around the conductor.
Insulation
The insulation system provides electrical separation between the conductor and surrounding layers.
Common insulation systems vary by cable type and application.
Insulation Screen
A semiconducting screen may surround the insulation to provide controlled electrical conditions and facilitate proper cable design.
Metallic Screen or Shield
The cable may contain a metallic screen, wire screen, tape screen, or another conductive component.
Its purpose and construction depend on the specific cable design.
Outer Sheath
The outer sheath protects internal components from mechanical and environmental influences.
Some cables may also contain armor or additional protective layers.
Because all these components contribute to overall dimensions, outside diameter should not be used as a substitute for identifying cable construction.
How to Measure a High Voltage Cable Cross Section
A cross-sectional inspection can reveal the arrangement of a cable’s internal layers, but this is not a routine measurement to perform on an installed cable.
If a legitimate cable sample is available for technical examination, qualified personnel can inspect the cross section to determine:
- Number of conductors
- Conductor construction
- Insulation thickness
- Screen dimensions
- Metallic components
- Sheath thickness
- Armor
- Overall diameter
Precision measurements can be made using suitable engineering instruments.
However, the resulting measurements should be compared with the manufacturer’s specifications or applicable technical documentation rather than used alone to approve a cable for service.
Tools Used to Measure High Voltage Cable
Different measurements require different tools.
| Tool | Measurement or Purpose | Typical Application |
|---|---|---|
| Measuring tape | Cable length | Accessible cable and route planning |
| Digital caliper | Outside diameter | Physical cable inspection |
| Diameter tape | Large cable diameter | Large-diameter cable |
| Micrometer | Small component dimensions | Detailed sample inspection |
| Cable identifier | Cable markings | Identifying cable specifications |
| Cable documentation | Ratings and construction | Specification verification |
| Specialized test equipment | Electrical characteristics | Qualified testing and diagnostics |
The appropriate equipment depends on the voltage level, cable type, test objective, and applicable safety procedure.
How to Measure an Installed High Voltage Cable
Installed high voltage cables require special consideration.
Do not attempt to physically handle, disconnect, strip, probe, or test a high voltage cable unless you are appropriately qualified and the required isolation and safety procedures are in place.
For installed cable, measurements may include:
- Route length
- Outside diameter
- Installation position
- Bend radius
- Termination dimensions
- Available clearance
- Conduit or duct dimensions
If the cable cannot be accessed safely, rely on engineering drawings, cable schedules, manufacturer documentation, installation records, or specialized professional equipment rather than attempting an unsafe physical measurement.
High Voltage Cable Size Chart: What to Record
There is no single universal high voltage cable size chart because cable dimensions and electrical ratings depend on the specific cable design, voltage class, conductor material, insulation system, standard, and manufacturer.
For cable identification, it is useful to create a record containing the following information:
| Specification | Information to Record |
|---|---|
| Cable type | Manufacturer’s cable designation |
| Voltage rating | Rated system/cable voltage |
| Conductor material | Copper or aluminum |
| Conductor size | Nominal cross-sectional area |
| Number of cores | Single-core or multicore |
| Insulation | Insulation system/material |
| Screen | Screen or shield construction |
| Armor | Armor type, if present |
| Outside diameter | Measured or manufacturer-specified diameter |
| Cable length | Actual or planned route length |
| Minimum bend radius | Manufacturer-specified requirement |
This approach is more useful than attempting to create a generic cable-size chart that could incorrectly imply that one dimension applies to every manufacturer.
How to Choose the Correct High Voltage Cable Size
Measuring an existing cable is only one part of selecting a replacement.
Cable selection should consider the complete electrical and physical application.
Consider Current-Carrying Requirements
The required conductor size depends on the electrical system and installation conditions.
Factors can include:
- Operating current
- Installation method
- Ambient conditions
- Conductor material
- Number of loaded circuits
- Thermal conditions
- Voltage drop requirements
- Applicable regulations and standards
The appropriate conductor size should be determined using the relevant engineering calculations and cable manufacturer’s data.
Consider Voltage Rating
The cable must be suitable for the system voltage and the applicable electrical requirements.
Do not substitute a cable simply because its conductor is the same size.
The insulation and overall cable design must also be appropriate.
Consider Physical Installation
Check:
- Cable outside diameter
- Conduit or duct capacity
- Cable tray dimensions
- Bend radius
- Termination space
- Cable gland requirements
- Mechanical protection
- Environmental conditions
A cable can have the correct electrical characteristics but still be unsuitable for a particular physical installation.
Common Mistakes When Measuring High Voltage Cable
Trying to Measure an Energized Cable
This is the most serious mistake.
Never use ordinary physical measuring tools on an energized high voltage conductor. Measurements should be performed only under appropriate electrical safety procedures by qualified personnel.
Assuming Diameter Equals Cable Size
Outside diameter does not directly indicate conductor cross-sectional area.
The internal construction must be considered.
Guessing the Voltage Rating
Voltage rating cannot reliably be established by looking at cable thickness.
Use cable markings and technical documentation.
Ignoring Cable Construction
Screening, insulation, armor, sheath, and other layers affect the cable’s dimensions and installation requirements.
Using a Generic Size Chart
High voltage cable dimensions can vary considerably between cable designs.
Always verify the exact cable manufacturer’s specifications before making engineering or installation decisions.
Forgetting Bend Radius
A cable may physically fit inside a space but still be unsuitable if the installation forces it into a bend tighter than the manufacturer’s specified minimum radius.
Tips for Accurate High Voltage Cable Measurement
For professional cable inspection and installation planning:
- Verify isolation and safety before handling the cable.
- Use the cable’s identification markings whenever available.
- Measure outside diameter without compressing the jacket.
- Follow the actual cable route when measuring length.
- Record measurements in consistent units.
- Compare physical measurements with manufacturer documentation.
- Record conductor material and nominal cross-sectional area separately from outside diameter.
- Check cable bend-radius requirements.
- Consider termination dimensions when determining total cable requirements.
- Do not cut into or strip an installed cable simply to determine its construction.
- Use qualified electrical personnel for high voltage testing and handling.
- Follow the applicable electrical code, cable standard, and manufacturer’s instructions.
Why Accurate High Voltage Cable Measurement Matters
Correct measurement helps prevent problems during cable replacement, installation, maintenance, and equipment upgrades.
Accurate information can help you:
- Order the correct cable length.
- Confirm physical installation compatibility.
- Select suitable cable glands and accessories.
- Verify available conduit or duct space.
- Document existing electrical infrastructure.
- Reduce material waste.
- Plan cable routes accurately.
- Compare an existing cable with replacement specifications.
- Identify discrepancies between drawings and physical installations.
For high voltage systems, however, measurement should always be part of a broader engineering and safety process.
Physical dimensions alone cannot establish whether a cable is electrically suitable.
Frequently Asked Questions About Measuring High Voltage Cable
How do I measure high voltage cable length?
For a loose, properly isolated cable, measure its actual path with a suitable measuring tape without stretching it. For an installed cable, measure the planned route or use appropriate professional equipment and installation documentation to determine the cable length.
How do I measure high voltage cable diameter?
For a safely accessible and de-energized cable, use a digital caliper or suitable diameter-measuring tool. Place the instrument gently against the outer jacket without compressing it, then compare the result with the manufacturer’s specified outside diameter.
Can cable diameter tell me the conductor size?
No. The outside diameter includes the conductor, insulation, screens, shielding, armor, and jacket. It cannot reliably establish conductor cross-sectional area. Use the cable marking, manufacturer’s datasheet, or verified engineering documentation to identify conductor size.
Can I measure an energized high voltage cable?
Do not physically handle or measure an energized high voltage cable with ordinary tools. High voltage systems require appropriate isolation, safety procedures, qualified personnel, and specialized equipment. Never treat an apparently accessible cable as safe simply because its outer jacket looks intact.
How do I identify a high voltage cable rating?
Check the cable jacket marking, manufacturer documentation, cable schedule, engineering drawings, and applicable specifications. Physical diameter or insulation appearance should not be used by itself to determine the cable’s voltage rating.
Does a thicker high voltage cable always have a higher rating?
No. A larger outside diameter can result from insulation, shielding, armor, jacket construction, or other components. Voltage capability depends on the complete cable design and its specified and tested characteristics, not simply its physical thickness.
Conclusion
Knowing how to measure high voltage cable involves more than measuring its outside dimensions. Cable length, outside diameter, conductor size, insulation construction, screen arrangement, voltage rating, and bend radius can all be important depending on the application.
For basic physical measurements, suitable tools such as measuring tapes, calipers, and diameter gauges can be useful when the cable is safely accessible and de-energized. For electrical characteristics and high voltage testing, appropriate professional equipment and qualified personnel are essential.
Most importantly, do not guess a cable’s electrical suitability from its appearance or diameter. Use the cable identification, manufacturer specifications, engineering documentation, and applicable standards to verify the exact cable before installation or replacement.